Tag Archives: inflatable kayak repair

Finding Leaks & Options for Repairing a PVC Inflatable Kayak

Over the past 20 years, we’ve received many questions from customers on repairing inflatable kayaks, locating leaks or adding d-rings and mounts. Just recently, we stumbled across a great tech sheet put together by Aquaglide a manufacturer of inflatable kayaks, standup paddle boards, and a new Backwoods lightweight, packable kayak series. We are reprinting the tech sheet below – read on to find out how to locate a leak in an inflatable kayak, what materials and repair methods to use and when to use them. As long time retailers of inflatable kayaks and paddle boards, we have expanded this to include some of our own AirKayaks tips.
GENERAL PVC REPAIRS – updated 07/30/2020
NOTE: The following instructions are for patching a basic leak on a PVC inflatable, typically a puncture or cut. More complicated repairs such as those near seams and corners, may require special repair techniques which are beyond the scope of this article.
Some Helpful Items and Where to find them

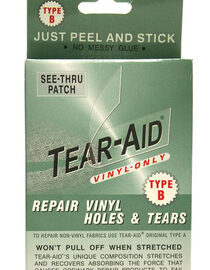
Tear-Aid – Tear-Aid Type B is a self-adhesive patch material that’s widely available online and at nationwide retail outlets like Walmart, Ace Hardware, AirKayaks, REI and more. Great for relatively long-term repair of punctures on all types of PVC products. Clear, non-toxic and easy to use.

Aquaseal FD– This is a liquid sealant that can be oozed into very small cracks, edges and pinholes. Widely available online and at nationwide retail outlets. This stuff is a little messy to work with and may be best applied using a small plastic irrigation syringe from the drug or hardware store.

Shoe Goo, Clear– Yup, seriously. This is a very thick vinyl-based adhesive that can be used for quick, short-term plugging of small holes on low pressure items. Widely available online and at nationwide retail outlets like Walmart, Lowes, Walgreens, Dick’s, REI and more.
Fabric Reinforced PVC – Reinforced PVC, or tarpaulin, is commercial grade material that is the basis for most of Aquaglide’s Duratex products. The strongest and most durable repair for Duratex items is generally to patch with material of the same type. This material can be found in the repair kit included with your Aquaglide product or purchased from an Aquaglide distributor. In a pinch, similar material can be found online, or at marine stores where RIB dinghies or whitewater rafts are sold or serviced. If you go this route, DO NOT use patch material or glue intended for Hypalon, which looks almost identical, but will result in a gooey mess when combined with PVC.

Contact Adhesive– For those choosing to repair with a reinforced PVC patch (see above), using good glue is critical. We recommend HH-66 vinyl adhesive, which is available through Aquaglide, and also widely available online, through Walmart and many local auto

Original Source: AirKayaks >>

How to Straighten a Bent Fin on an Inflatable Kayak or SUP

It’s a common occurrence – you just purchased an inflatable kayak or paddle board and excitedly open the box to discover – bent fins!

While this might appear devastating at first, straightening an integrated bent fin on an inflatable is a fairly easy task – basically, the application of heat allows it to return to normal. (Please note, this is just for the integrated flexi-fins found on many inflatables, not the removable rigid fins.)
Here are three options:
1) If it is a minor bend, flip your inflatable upside down and let it sit in the sun for a while. This often will return it to a straight position. (Please note: do NOT put your inflatable in the sun at full pressure – release some of the air so that it feels soft.)

2) For tougher bends, use a hair dryer. Hold the fin and after about 5 or 10 minutes the fin should soften enough to slowly straighten.

3) Very tough bends may require a little more effort. We thank Red Paddle Co for the photos and information on the “hot water” fix per below:

Pour hot water from the kettle on to the fin to make the fin flexible.

Straighten the fin with your hands and then using sticky tape secure the fin in its upright position.

Allow to cool either naturally or by pouring cold water over the fin. You should find your fin is now straight.

How to ensure this doesn’t happen again?
Make sure to store the inflatable in such a way that the fins are not bent. Some of this can be accomplished by folding. For instance the Airis paddle boards are folded one third up, then one-third again, then the fin is folded over (sticking up into the air). The board is then folded in half the long way, which nestles the fin between the layers.

 
Some inflatables come with fin protectors – bladder rings that slip over the fins.

If you don’t have fin protectors, you can easily fashion some by cutting a slit in a large block of styrofoam – any pressure will rest on the block, and not the fin itself.
Also make sure to not sit in the kayak when on dry ground for any length of time. If you must, then provide some type of support underneath.

Taking any of these simple steps will ensure that you are paddling on a straight course, and not “around in circles.”

Original Source: AirKayaks >>

How to Straighten a Bent Fin on an Inflatable

It’s a common occurrence – you just purchased an inflatable kayak or paddle board and excitedly open the box to discover – bent fins!

While this might appear devastating at first, straightening an integrated bent fin on an inflatable is a fairly easy task – basically, the application of heat allows it to return to normal. (Please note, this is just for the integrated flexi-fins found on many inflatables, not the removable rigid fins.)
Here are three options:
1) If it is a minor bend, flip your inflatable upside down and let it sit in the sun for a while. This often will return it to a straight position. (Please note: do NOT put your inflatable in the sun at full pressure – release some of the air so that it feels soft.)

2) For tougher bends, use a hair dryer. Hold the fin and after about 5 or 10 minutes the fin should soften enough to slowly straighten.

3) Very tough bends may require a little more effort. We thank Red Paddle Co for the photos and information on the “hot water” fix per below:

Pour hot water from the kettle on to the fin to make the fin flexible.

Straighten the fin with your hands and then using sticky tape secure the fin in its upright position.

Allow to cool either naturally or by pouring cold water over the fin. You should find your fin is now straight.

How to ensure this doesn’t happen again?
Make sure to store the inflatable in such a way that the fins are not bent. Some of this can be accomplished by folding. For instance the Airis paddle boards are folded one third up, then one-third again, then the fin is folded over (sticking up into the air). The board is then folded in half the long way, which nestles the fin between the layers.

 
Some inflatables come with fin protectors – bladder rings that slip over the fins.

If you don’t have fin protectors, you can easily fashion some by cutting a slit in a large block of styrofoam – any pressure will rest on the block, and not the fin itself.
Also make sure to not sit in the kayak when on dry ground for any length of time. If you must, then provide some type of support underneath.

Taking any of these simple steps will ensure that you are paddling on a straight course, and not “around in circles.”

Original Source: AirKayaks >>