Tag Archives: inflatable tandem kayaks

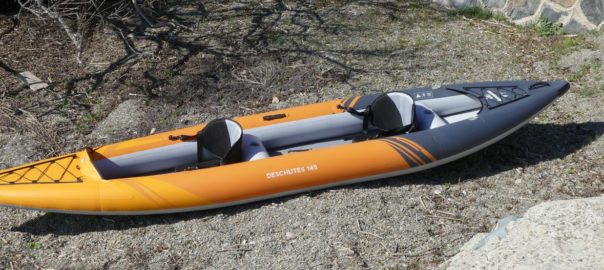
Product Review: New Deschutes 145 Inflatable Tandem Kayak from Aquaglide

As posted earlier this year, Aquaglide’s inflatable kayak and paddle board product line for 2020 underwent a major makeover, with the introduction of seven new models, a facelift for three models and the retirement of 6 models.

As some of the new products have arrived, we’ve begun a series on the new Deschutes models. Our first two reviews included the Deschutes 110 and Deschutes 130, so we finish up our series with the Deschutes 145, an open-style, 14.5 foot inflatable kayak designed for tandem paddling. (Please note: some of the information will be repeated from other writeups.)
Getting Started with the Aquaglide Deschutes 145
The kayak is nicely packaged with bubble wrap protecting valves, handles, etc. We unpacked the box and laid out the pieces – inflatable kayak body, backpack, instructions, repair kit, tracking fin, two seats, valve adaptor and a plastic splash guard. The repair kit features generous-sized repair patches, a valve wrench and glue.

Initial measurements showed the kayak body weighs approximately 26 lbs with the seats adding another 4 lbs (2 lbs each). The kayak with seats and fin – all in the backpack – weighs 34 lbs. Folded size of the kayak body is 26 x 22 x 9 inches. Backpack size is roughly 27 x 23 x 18 inches, which can be cinched down. All boxed up, the dimensions are 30 x 28 x 16 inches with a shipping weight of 45 lbs. It’s a squeeze, but if you fully deflate the kayak you can get optional paddles and pump into the pack.
(AirKayaks Side note #1: When initially removing the kayak from the carrying case, take a good look at how the kayak is folded.)
The Deschutes 145 comes with an instruction manual, but as previously mentioned, the instructions aren’t detailed enough for new users. This is compounded by the manual layout in which each section is first written in English, then up-to 17 different languages (including Bulgarian and Estonian), before you get to the next English section. The inflation instructions start on page 16.

Set up is straight-forward and simple – unpack, unfold, inflate.
The instructions say to put the valve in the closed position and to pump up the sides to 3 PSI, but there are no details explaining this in the instructions.

For those unfamiliar, the military-style plunger valve is simple to use – with your finger, twist the plunger slightly up to the “closed” position to inflate (air goes in but doesn’t come back out) and “down” to deflate or open (air comes out).

The Deschutes 145 military valves require a special adaptor, which is found in the repair kit. It must be friction-fit to a Boston valve adaptor; this is a common fitting, slightly conical and about 1/2 inch
Original Source: AirKayaks >>

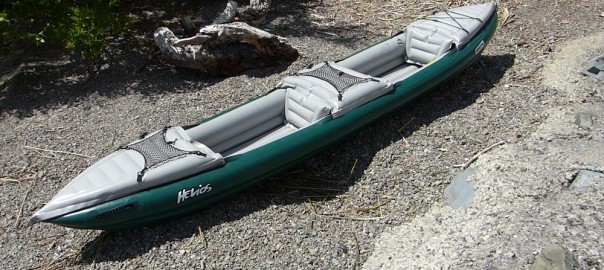
Product Review: Compact Innova Helios 2 Inflatable Kayak

This past week we had the opportunity to take our first look at the Innova Helios 2 inflatable kayak – a two person kayak with integrated decks providing expanded storage options.

The Innova line is unique for a number of reasons. First, all the kayaks are handmade in the Czech Republic; the factory has manufactured inflatable boats for well over 50 years. In Europe, a similar line is marketed under the name Gumotex.
We previously published our review on the single version Innova Helios 1. So here is our write-up on the the Innova Helios 2 inflatable tandem kayak, which weighs 36 lbs in the pack, is 12’6″ inches in length and has a payload of 396 lbs for two persons and gear. (Please note: some of the information will be duplicated from other Innova reviews).
Getting Started with the Innova Helios 2
The box as received is surprisingly small – only 25 x 16 x 11 inches – and weighing in at 38 lbs.

Inside is a very nifty and compact backpack with adjustable shoulder straps, front pouch pocket and roll top closure. This contains the kayak body, foot rests, repair kit, instructions, valve adaptor and sponge. At only 36 lbs for the pack and contents, the Helios 2 is small enough to be considered carry-on luggage, and will fit in an airplane overhead bin. Packed dimensions are 22 x 15 x 9 inches as received in the bag.
Helios 2 Setup/Inflatation
We read through the included instruction manuals. Just like all the other Innova  products, the Innova Helios manual is surprisingly detailed in some aspects, while lacking in others. As the kayaks are made in Europe, many of the details are based around European specs and regulations and can sound more complicated than it actually is.

First step, unpack and unfold the kayak body. What is immediately noticeable is how FLAT the kayak is when deflated – of course, this makes it quite compact for travel.

The Helios 2 has a “shoe” for those using an optional tracking fin. (Please note: both Helios kayaks do not come with the tracking fin, though we tested the following Helios 2 with one.) Install the tracking fin before inflating the kayak. Slip the end with the larger slot in first, making sure that the fin is pointing towards the “back” of the kayak. This enables it to slide in enough to fit in the second side. The first time we tried this, we struggled for a few minutes to get the second slot into position; this gets easier with use. (AirKayaks note: The second time we installed the fin, the kayak was wet and it was much simpler. According to Innova, utilizing McNett UV Tech also helps initially, but after

Original Source: AirKayaks >>

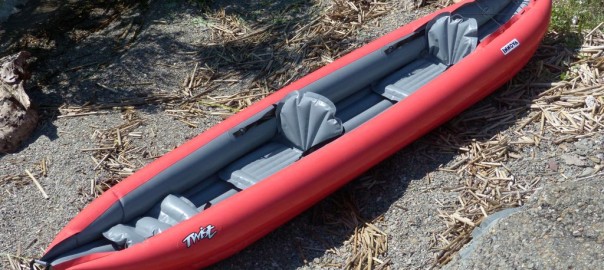
Product Review: New Innova Twist II LN Inflatable Tandem Kayak

In May we received our first shipment of the newly-updated Innova Twist and Swing inflatable kayaks for 2016. Made in the Czech Republic, the Twist and Swing models are now constructed from Light Nitrilon (LN), a lighterweight version of the rugged material used in the traditional Innova Sunny, Helios and Safari models. Light Nitrilon is known for making the kayaks more rigid as well as water and abrasion resistant, without substantially increasing weight. It’s also PVC-free, thus environmentally friendly.

New features also include improved seating and beefed up foot brace. The new seating arrangement is removable and inflatable, making it easier to reposition the paddling locations, optimizing paddling performance and comfort.
This week we had the first opportunity to take out the  revamped Innova Twist II LN, an 11 foot 10-inch two-person inflatable weighing a mere 26 lbs (including seats and foot brace) with a selling price of $549.
Please note: Some of this information will be repeated from prior write-ups.
Innova Twist II: Getting Started
The box as received measures 21.5 x 16 x 10 inches, weighing in at 28.5 lbs.

Inside is the Twist II LN body, cinch strap, multiple instruction sheets, tracking fin, foot rest, repair kit, two seats, bilge sponge and valve adaptor. The Twist II LN body with seats and brace weighs 26 lbs with a folded size of 20 x 15 x 8. AirKayaks note: While the instructions say the Twist II LN comes with a drawstring carrying sack, these were not included in the first shipments. The bags are currently being shipped over and will be added to the boxes.
Innova Twist 2 Setup/Inflatation
We read through the included instruction manuals. As with all the Innova manuals to date, the instructions are quite detailed – there is one instruction sheet for fin installation, one for utilizing the valves, and another on the kayak in general. Most include IKEA-style graphics which are occasionally just short of a brain twister, and while some steps are dauntingly detailed, some are not mentioned.  As the kayaks are made in Europe, many of the details are based around European specs and regulations.

First step, unpack and unfold the kayak body. What is immediately noticeable is how FLAT the kayak is when deflated.

Install the tracking fin before inflating the kayak. The Twist II LN utilizes a single fin with double slots. Slip the end with the larger slot in first, making sure that the fin is pointing towards the “back” of the kayak. This enables it to slide in enough to fit in the second slot. While the first time can be a struggle to get the back side into position, after a couple of rounds it becomes quite easy. Pull up on the fin to ensure you

Original Source: AirKayaks >>

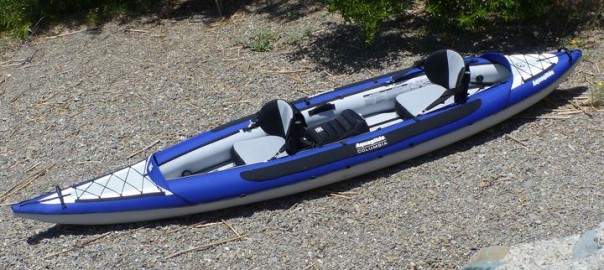
Product Review: Columbia Tandem HB Inflatable Kayak from Aquaglide – for 1-3 paddlers.

We continue with our series on the new Aquaglide line of inflatable kayaks. Our first two reviews focused on the Chinook price-point line – the Chinook Two and the Chinook Tandem inflatable kayaks.
Our third review moved into the flagship Columbia line of high pressure inflatables, beginning with the Columbia One HB – a high-pressure touring model for one paddler. The Columbia line also consists of the Columbia 2 HB (for one to two paddlers) and the Columbia Tandem (for 1 to 3 paddlers).

Our current review focuses on the Columbia Tandem HB, a 15 foot long inflatable kayak designed for one or two paddlers – with extra space for gear, child or pet. (Please note: some of the information will be repeated from other writeups.)
Getting Started with the Aquaglide Columbia HB Tandem:

We unpacked the box and laid out the pieces – inflatable kayak, backpack, instructions, repair kit, foot braces, tracking fin, two standard seats and a jumper seat.

Initial measurements showed the kayak body weighs approximately 40 lbs, with a backpack size of roughly 27 x 22 x 18 inches, while the kayak with seats, fin and braces – all in the backpack – weighs 49 lbs. Boxed up, the dimensions are 33 x 30 x 15 inches with a shipping weight of 60 lbs.
(AirKayaks Side note #1: When initially removing the kayak from the carrying case, take a good look at how the kayak is folded This is probably the most overlooked step and it is VERY helpful when trying to get the kayak back into the bag.)
The included instructions are adequate and include diagrams with inflation details.

Set up is straight-forward and simple  – unpack, unfold, inflate.
There are two inflation chambers utilizing Boston valves – the two side chambers – while the high-pressure floor features a military valve. There are three more small chambers with twistlock valves, for the seat bases. The floor is pumped up first.

The military-style plunger valve is simple to use – with your finger, twist the plunger slightly to the “up” position to inflate (air goes in but doesn’t come back out) and “down” to deflate (air comes out).

The Columbia Tandem HB floor requires a miltary valve adaptor, which does not come with most standard pumps. Here is where we came to our first issue – no military valve adaptor was included. We were aware of this from our previous writeup on the Columbia One, and pulled one out of our parts box. (AirKayaks note #2: We spoke with AquaGlide. The first couple of shipments did not include the adaptor, but subsequent shipments will. We did obtain a number of fittings that we will be including with the first shipments.)
Lock the adaptor onto the military valve with

Original Source: AirKayaks >>