Tag Archives: reviews

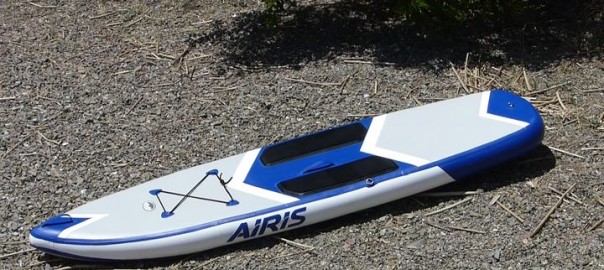
Product Review: Airis HardTop Stubby 9 Inflatable Standup Paddle Board (ISUP) from Walker Bay

We continue with our write-ups on the new Airis HardTop series of inflatable paddle boards from Walker Bay – the Hardtop Tour 12.5, Hardtop SUV 11 and Hardtop Stubby 9.
The Hardtop hybrid design combines Walker Bay’s patented 6-inch thick AirWeb construction with RigiDeck non-skid fiberglass steps. While each of the three models features bungee attachment points for storing gear, the Hardtop SUV and Stubby also include seat attachments points, allowing sit-down paddling with purchase of an optional backrest.

Our first review was on the Airis SUV 11, so this time we selected the Stubby 9 – a 10-PSI minimalist – as the simplicity and light-weight were appealing. Please note, some of the information from previous Airis reviews will be repeated here.
Getting Started with the Airis Stubby 9 ISUP
The box as received weighs 29 lbs, measuring 28 x 20 x14 inches.

Inside is the updated Airis backpack, a duffel bag with adjustable shoulder straps, drawstring top and mesh side panel. Also included in the box is a repair kit, dual-action hand-pump, gauge and instructions. The HardTop Stubby 9 can be folded up to easily fit inside the backpack, along with the pump. Folded measurements are 28 x 10 x 19 inches.
The ISUP in the backpack with pump weighs 25 lbs – the body alone is 22 lbs.
Airis Stubby 9 Inflatable SUP Setup/Inflatation
Setup for the Airis Stubby 9 is remarkably simple as there is basically one piece.

First step – unpack and unfold the board.

The Airis Stubby 9 features one main inflation chamber utilizing a military valve – this is located on the side rail towards the stern. The military-style plunger valve is simple to use – with your finger, twist the plunger slightly to the “up” position to inflate (air goes in but doesn’t come back out) and “down” to deflate (air comes out).

Put the pressure gauge on the included double action pump, locking it in between the pump itself and the hose. (Please note: there is an inflate and a deflate side to the pump/hose attachment.) The pump comes with a military valve adaptor which locks onto the valve with a slight twist.

All the new Airis kayaks and SUPS come with an updated pump, which we term a “dual action” pump – a single action/double action hand pump. This is defaulted to the “double action” which means the air is pushed in on the up and the down stroke. When obtaining higher pressures (towards the 3 and 4 PSI range) it becomes increasingly tougher to pump. With a simple “twist of the knob” the pump becomes a single action pump – pushing air in on the down stroke only, making it easier to reach the higher ranges.

Start pumping. After a couple of minutes
Original Source: AirKayaks >>

Product Review: Columbia Tandem HB Inflatable Kayak from Aquaglide – for 1-3 paddlers.

We continue with our series on the new Aquaglide line of inflatable kayaks. Our first two reviews focused on the Chinook price-point line – the Chinook Two and the Chinook Tandem inflatable kayaks.
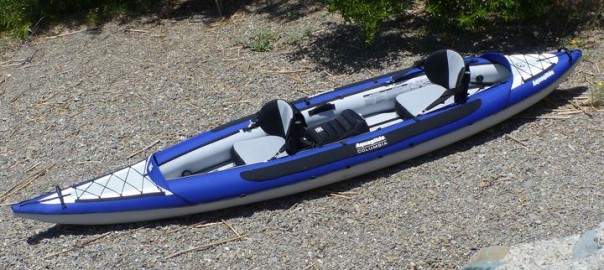
Our third review moved into the flagship Columbia line of high pressure inflatables, beginning with the Columbia One HB – a high-pressure touring model for one paddler. The Columbia line also consists of the Columbia 2 HB (for one to two paddlers) and the Columbia Tandem (for 1 to 3 paddlers).

Our current review focuses on the Columbia Tandem HB, a 15 foot long inflatable kayak designed for one or two paddlers – with extra space for gear, child or pet. (Please note: some of the information will be repeated from other writeups.)
Getting Started with the Aquaglide Columbia HB Tandem:

We unpacked the box and laid out the pieces – inflatable kayak, backpack, instructions, repair kit, foot braces, tracking fin, two standard seats and a jumper seat.

Initial measurements showed the kayak body weighs approximately 40 lbs, with a backpack size of roughly 27 x 22 x 18 inches, while the kayak with seats, fin and braces – all in the backpack – weighs 49 lbs. Boxed up, the dimensions are 33 x 30 x 15 inches with a shipping weight of 60 lbs.
(AirKayaks Side note #1: When initially removing the kayak from the carrying case, take a good look at how the kayak is folded This is probably the most overlooked step and it is VERY helpful when trying to get the kayak back into the bag.)
The included instructions are adequate and include diagrams with inflation details.

Set up is straight-forward and simple  – unpack, unfold, inflate.
There are two inflation chambers utilizing Boston valves – the two side chambers – while the high-pressure floor features a military valve. There are three more small chambers with twistlock valves, for the seat bases. The floor is pumped up first.

The military-style plunger valve is simple to use – with your finger, twist the plunger slightly to the “up” position to inflate (air goes in but doesn’t come back out) and “down” to deflate (air comes out).

The Columbia Tandem HB floor requires a miltary valve adaptor, which does not come with most standard pumps. Here is where we came to our first issue – no military valve adaptor was included. We were aware of this from our previous writeup on the Columbia One, and pulled one out of our parts box. (AirKayaks note #2: We spoke with AquaGlide. The first couple of shipments did not include the adaptor, but subsequent shipments will. We did obtain a number of fittings that we will be including with the first shipments.)
Lock the adaptor onto the military valve with

Original Source: AirKayaks >>

Product Review: Columbia One HB Inflatable Kayak from AquaGlide

We continue with our series on the new Aquaglide line of inflatable kayaks.
Our two previous reviews focused on the Chinook price-point line. Our next set of reviews features the Columbia HB series, AquaGlide’s flagship line of high pressure inflatables.
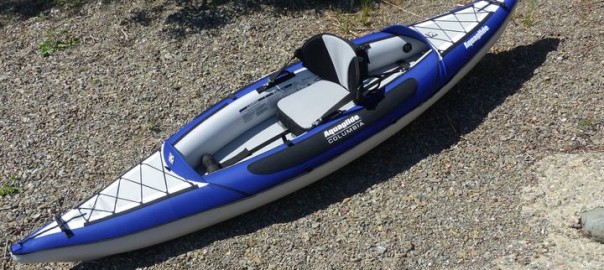
We begin with the Columbia One HB – a high-pressure touring model for one paddler. The Columbia HB line also consists of the Columbia Two HB (for one to two paddlers) and the Columbia Tandem HB (for 1 to 3 paddlers).

Following is our writeup on the Columbia One HB, a 11.25 foot inflatable one-person model selling for $699.
Getting Started with the Aquaglide Columbia HB One:
We unpacked the box and laid out the pieces – inflatable kayak, backpack, instructions, repair kit, foot brace, tracking fin and seat.

Initial measurements showed the kayak body weighs 26.5 lbs, with a backpack size of roughly 27 x 22 x 12 inches, while the kayak with seat, fin and brace – all in the backpack – weighs 32 lbs. Boxed up, the dimensions are 31 x 26 x 12 inches with a shipping weight of 42 lbs.
(AirKayaks Side note #1: When initially removing the kayak from the carrying case, take a good look at how the kayak is folded This is probably the most overlooked step and it is VERY helpful when trying to get the kayak back into the bag.)
The included instructions are adequate and include diagrams with inflation details.

Set up is straight-forward and simple  – unpack, unfold, inflate.
There are two inflation chambers utilizing Boston valves – the two side chambers – while the high-pressure floor features a military valve. The floor is pumped up first.

The military-style plunger valve is simple to use – with your finger, twist the plunger slightly to the “up” position to inflate (air goes in but doesn’t come back out) and “down” to deflate (air comes out).
The Columbia One HB floor requires a miltary valve adaptor, which does not come with most standard pumps. Here is where we came to our first issue – no military valve adaptor was included. Luckily, we rummaged through our box of parts and found one that fit. (AirKayaks note #2: We spoke with AquaGlide. The first couple of shipments did not include the adaptor, but subsequent shipments will. We did obtain a number of fittings that we will be including with the first shipments.) Lock the adaptor onto the military valve with a slight twist, and push the conical adaptor in to friction fit the two. Since the main chambers are inflated to 3 PSI, it is helpful to use a pump with pressure gauge to ensure the kayak is inflated appropriately.

The floor is held in place with adjustable straps. Pump up the floor to  at

Original Source: AirKayaks >>

Product Review: Chinook Tandem Inflatable Kayak from AquaGlide for 1-3

As mentioned in previous posts, Aquaglide, Inc of White Salmon, Washington has recently introduced a new line of inflatable kayaks for 2014. The Aquaglide product line consists of 12 models with MSRP pricing from $199.95 to $1099.95.

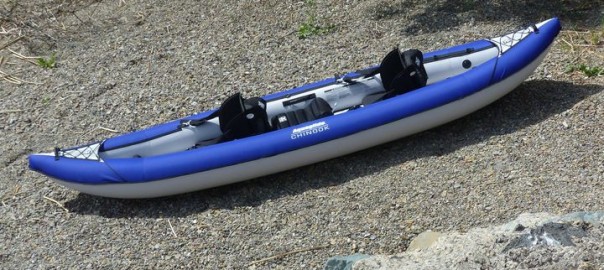
Our first shipment included the Chinook inflatable kayaks – part of Aquaglide’s “pricepoint” series. The Chinook kayaks feature economically-priced recreational models in two sizes – the 10 foot Chinook 2 and 12.5 foot Chinook Tandem. Our first write-up featured the Chinook 2;  for the second review we focus on the Chinook Tandem 2+ person model.  Featuring multiple seating locations, the 12.5 foot AquaGlide Chinook Tandem sells for $499 and is roomy enough to handle three.
Please note that many of these instructions have been repeated from the first writeup on the Chinook 2.
Getting Started with the Aquaglide Chinook Tandem:
We unpacked the box and laid out the pieces – inflatable kayak, drawstring duffel bag, instructions, repair kit, two foot braces, tracking fin, two main seats and a jumper seat.

Initial measurements showed the kayak body weighs 34 lbs, with a case size of roughly 29 x 16 x 16 inches, while the kayak with seats, fin and braces weighs 41 lbs. Boxed up, the dimensions are 31 x 18 x 17 inches with a shipping weight of 50 lbs.
(AirKayaks Side note #1: When initially removing the kayak from the carrying case, take a good look at how the kayak is folded This is probably the most overlooked step and it is VERY helpful when trying to get the kayak back into the bag.)
The included instructions are adequate and include diagrams with inflation details.

Set up is straight-forward and simple  – unpack, unfold, inflate.

There are three inflation chambers utilizing Boston valves – the floor and two side chambers. Boston valves are two-part, screw-on valves. The bottom portion is threaded onto the kayak, the top valve is screwed open for inflation and then tightened shut after inflation. Air is easily released by unscrewing the base connector. How does it work? A flap inside the valve opens when air is pumped into the kayak, and falls shut when not pumped so that air will not rush back out.
(AirKayaks Side note #2: The Boston valves have a tether that keeps the valve attached to the kayak, ensuring that the valves don’t get lost after deflating. Make sure that the string does not get in the way when screwing on the valve base, and the valve is not cross-threaded, or you may have some air leakage.)

With the base portion screwed onto the kayak body, and the top portion screwed open, locate the Boston valve adaptor on your pump (conical nozzle about 1/2 inch in diameter) and friction fit it into the valve opening.
We

Original Source: AirKayaks >>

Product Review: New Chinook 2 Inflatable Kayak from Aquaglide for 1-2 Paddlers

As mentioned in previous posts, Aquaglide, Inc of White Salmon, Washington has recently introduced a new line of inflatable kayaks for 2014. The Aquaglide product line consists of 12 models with MSRP pricing from $199.95 to $1099.95.
Our first shipment included the Chinook 2. Part of Aquaglide’s “pricepoint” series, the Chinook kayaks are economically-priced recreational models in two sizes – 10 and 13 feet.

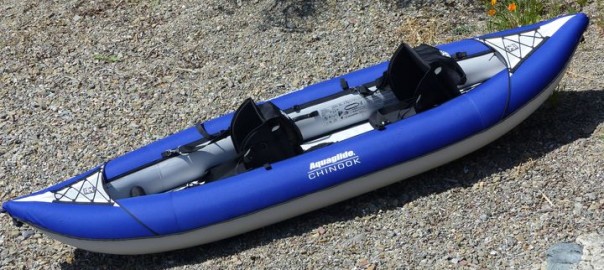
Following is our writeup on the Chinook 2, a 27-lb, 10 foot tandem model selling for $399. Featuring multiple seating locations, the Chinook 2 can be paddled by one or two persons.
Getting Started with the Aquaglide Chinook 2:
We unpacked the box and laid out the pieces – inflatable kayak, drawstring duffel bag, instructions, repair kit, two foot braces, tracking fin and two seats.

Initial measurements showed the kayak body weighs 27 lbs, with a case size of roughly 29 x 16 x 16 inches, while the kayak with seats and braces weigh 32 lbs. Boxed up, the dimensions are 30 x 17 x 16 inches with a shipping weight of 40 lbs.
(AirKayaks Side note #1: When initially removing the kayak from the carrying case, take a good look at how the kayak is folded This is probably the most overlooked step and it is VERY helpful when trying to get the kayak back into the bag.)
Chinook 2 Kayak Inflatation and Setup:
The included instructions are adequate and include diagrams with inflation details.

Set up is straight-forward and simple  – unpack, unfold, inflate.

There are three inflation chambers utilizing Boston valves – the floor and two side chambers. Boston valves are two-part, screw-on valves. The bottom portion is threaded onto the kayak, the top valve is screwed open for inflation and then tightened shut after inflation. Air is easily released by unscrewing the base connector. How does it work? A flap inside the valve opens when air is pumped into the kayak, and falls shut when not pumped so that air will not rush back out.
(AirKayaks Side note #2: The Boston valves have a tether that keeps the valve attached to the kayak, ensuring that the valves don’t get lost after deflating. Make sure that the string does not get in the way when screwing on the valve base, and the valve is not cross-threaded, or you may have some air leakage.)
With the base portion screwed onto the kayak body, and the top portion screwed open, locate the Boston valve adaptor on your pump (conical nozzle about 1/2 inch in diameter) and friction fit it into the valve opening.

We pumped up the floor until firm (1.0 psi with slight give) using a standard double action hand pump – this took about 25 to 27 pumps. We then pumped up each of the side

Original Source: AirKayaks >>