Tag Archives: aquaglide kayak reviews

Product Review: AquaGlide Blackfoot HB Angler XL Inflatable Kayak for 1 or 2 Paddlers

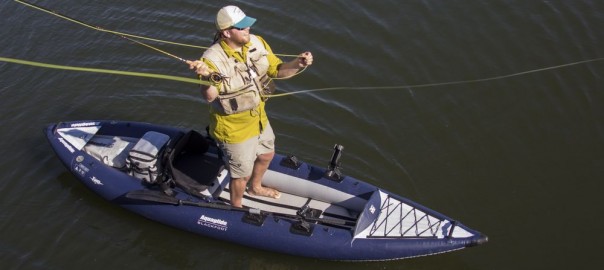
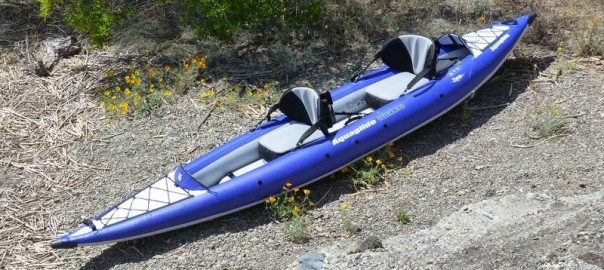
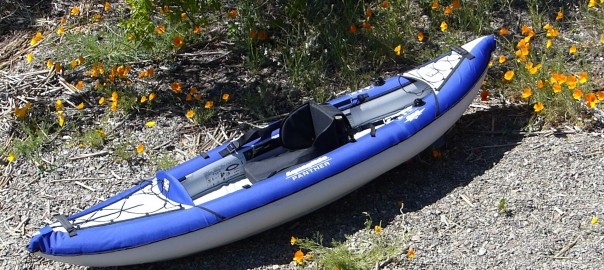
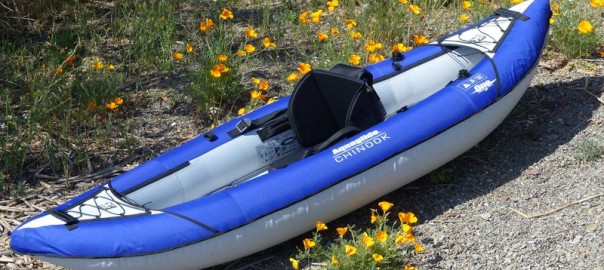
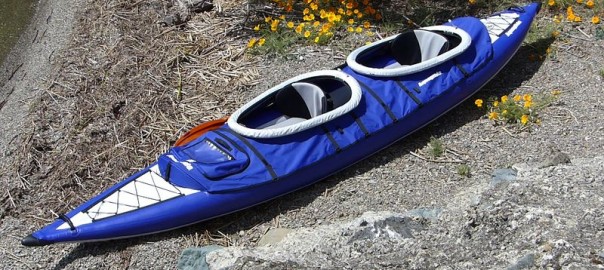
We continue with our series on the new AquaGlide line of inflatable kayaks, specifically the fishing models. We previously reviewed the new high pressure Blackfoot HB Angler SL single-person inflatable kayak followed by the 11-0 Blackfoot Angler Inflatable Paddle Board. We now turn to the Blackfoot HB Angler XL – an elongated 13-foot version which can be set up as the ultimate one-person fishing machine, but can easily switch to a two-person model by adding an optional seat.

Please note, some of this will be repeated from other reviews.
Getting Started with the AquaGlide Blackfoot HB Angler XL:
We unpacked the box and laid out the pieces – inflatable kayak, backpack, instructions, repair kit, foot brace, tracking fin, visor lift, booster seat, adaptor, fishing cooler with rod holders and Core seat.

Initial measurements showed the kayak body with bolster weighs 31.75 lbs while the kayak with seat, fin and brace in the backpack (everything but the cooler) weighs 37.4 lbs. Backpack size (filled) is roughly 27 x 20 x 14 inches. The fishing cooler weighs an additional 3.25 lbs and flattens to 20 x 13 x 3 inches; we did manage to fit it into the backpack. Boxed up, the entire package dimensions are 24 x 20 x 14 inches with a shipping weight of 48 lbs.
(AirKayaks Side note #1: When initially removing the kayak from the carrying case, take a good look at how the kayak is folded. This is probably the most overlooked step and it is VERY helpful when trying to get the kayak back into the bag.)
The included instructions are adequate and include diagrams with inflation details.

Set up is straight-forward and simple  – unpack, unfold, inflate.
There are three inflation chambers utilizing high-pressure military valves – the two side chambers and the floor. The floor is pumped up first.

The military-style plunger valve is simple to use – with your finger, twist the plunger slightly to the “up” position to inflate (air goes in but doesn’t come back out) and “down” to deflate (air comes out).

The Blackfoot HB XL valves require a military valve adaptor, which does not come with most standard pumps. The adaptor was located inside the repair kit.  Friction fit the military valve adaptor onto the Boston valve adaptor (slightly conical-shaped nozzle), then lock onto the military valve with a slight twist. Since the chambers are inflated from 3 to 12 PSI, it is helpful to use a pump with pressure gauge to ensure the kayak is inflated appropriately.
Here we had our first issue – we could not get the adaptor to couple to the valve. From past experience, we found this could be two things. One, the o-ring can be very stiff initially or two, there is such

Original Source: AirKayaks >>

Product Review: Chelan HB Two Inflatable Kayak from Aquaglide – for 1-2 paddlers

Last summer, AquaGlide unveiled their new inflatable kayak lineup for 2015, which included a series of new models and revamps. Based on the number of inquiries, we were anxious to try out the new Chelan HB high-pressure series.
The new models arrived earlier this year, and we started inflating and testing, beginning with the Chelan HB Tandem XL and Chelan HB One. This was followed by the Columbia XP Tandem XL, Chinook One and Panther.

Our sixth 2015 review focuses on the Chelan HB Two, a 13.5 foot long inflatable kayak designed for one or two paddlers. At this time, we will point out that the AquaGlide kayak models are named after rivers in Washington State, and the river is pronounced “shuh-LAN.”
(Please note: some of the information will be repeated from other writeups.)
Getting Started with the Aquaglide Chelan HB Two:
We unpacked the box and laid out the pieces – inflatable kayak, backpack, instructions, repair kit, foot braces, tracking fin, two seats,  valve adaptor and two pieces of plastic.

Initial measurements showed the kayak body weighs approximately 27 lbs, with a backpack size of roughly 27 x 22 x 18 inches, while the kayak with seats, fin and braces – all in the backpack – weighs 38.5 lbs. Boxed up, the dimensions are 26 x 25 x 12 inches with a shipping weight of 46 lbs.
(AirKayaks Side note #1: When initially removing the kayak from the carrying case, take a good look at how the kayak is folded. This is probably the most overlooked step and it is VERY helpful when trying to get the kayak back into the bag.)
The included instructions appeared adequate and include diagrams with inflation details.

Set up is straight-forward and simple  – unpack, unfold, inflate.
There are three military valves (both sides and the floor) with two more small chambers utilizing twistlock valves for the seat bases – the floor is pumped up first, to 6 PSI.
The floor is held in place with two adjustable straps. From our prior experience, we found it best to loosen up the straps, otherwise the floor could be inflated “lopsided.”

The military-style plunger valve is simple to use – with your finger, twist the plunger slightly to the “up” position to inflate (air goes in but doesn’t come back out) and “down” to deflate (air comes out).
The Chelan HB Two military valves require a special adaptor, which does not come with most standard pumps. In Aquaglide’s first year, the military adaptors were not included with the high-pressure kayaks, which caused problems. All the 2015 high pressure models now include the adaptor, which is found in the repair kit.

The Aquaglide military adaptor couples to the valve with a Boston valve adaptor; this is a common fitting, slightly

Original Source: AirKayaks >>

Product Review: New Panther Compact Inflatable Kayak from Aquaglide

As mentioned in previous posts, Aquaglide, Inc of White Salmon, Washington has recently introduced several new inflatable kayaks for 2015. The Aquaglide kayak product line consists of 15 models with MSRP pricing from $199.95 to $1199.95.

Our first shipment included the new Panther inflatable kayak. Part of Aquaglide’s “pricepoint” series, the Panther is a cross between the Columbia XP One and Chinook One inflatable kayaks, scaled down for “smaller” people – both youth and adults.
Following is our writeup on the Panther, a 24-lb, 9 foot solo model selling for $349.
Getting Started with the AquaGlide Panther Inflatable Kayak
We unpacked the box and laid out the pieces – inflatable kayak, backpack, instructions, repair kit, tracking fin and seat.

Initial measurements showed the kayak body weighs 19 lbs, with a folded size of roughly 25 x 17 x 10 inches, while the kayak with seat in the drawstring sack weighs 24 lbs. Boxed up, the dimensions are 27 x 20 x 10 inches with a shipping weight of 29.5 lbs.
(AirKayaks Side note #1: When initially removing the kayak from the carrying case, take a good look at how the kayak is folded This is probably the most overlooked step and it is VERY helpful when trying to get the kayak back into the bag.)
AquaGlide Panther Inflatation and Setup:
The included instructions are adequate and include diagrams with inflation details.

Set up is straight-forward and simple  – unpack, unfold, inflate.

There are three inflation chambers utilizing Boston valves – the floor and two side chambers. Boston valves are two-part, screw-on valves. The bottom portion is threaded onto the kayak, the top valve is screwed open for inflation and then tightened shut after inflation. Air is easily released by unscrewing the base connector. How does it work? A flap inside the valve opens when air is pumped into the kayak, and falls shut when not pumped so that air will not rush back out.

According to the instructions, the floor is pumped up first, then the two side chambers. First, attach the Boston valves by screwing them onto the kayak.
(AirKayaks Side note #2: The Boston valves have a tether that keeps the valve attached to the kayak, ensuring that the valves don’t get lost after deflating. Make sure that the string does not get in the way when screwing on the valve base,and the valve is not cross-threaded, or you may have some air leakage.)

We pumped up the floor until firm (1.0 psi with slight give) using a standard double action hand pump – this took about 20 pumps.

We then pumped up each of the side chambers to 2 PSI – this was about 20 to 23 pumps each side – and screwed on the valve caps. (AirKayaks side note #3:

Original Source: AirKayaks >>

Product Review: New Chinook XP One Inflatable Kayak from Aquaglide

As mentioned in previous posts, Aquaglide, Inc of White Salmon, Washington has recently introduced several new inflatable kayaks for 2015. The Aquaglide product line consists of 15 models with MSRP pricing from $199.95 to $1199.95.

Our first shipment included the Chinook XP One. Part of Aquaglide’s “pricepoint” series, the Chinook kayaks are economically-priced recreational models, now in three sizes – 8.5, 10 and 13 feet.
Following is our writeup on the Chinook XP One, a 24-lb, 8.5 foot solo model selling for $349.
Getting Started with the Chinook XP One
We unpacked the box and laid out the pieces – inflatable kayak, drawstring duffel bag, instructions, repair kit, tracking fin and seat.

Initial measurements showed the kayak body weighs 21 lbs, with a folded size of roughly 23 x 17 x 8 inches, while the kayak with seat in the drawstring sack weighs 24 lbs. Boxed up, the dimensions are 24 x 21 x 12 inches with a shipping weight of 30 lbs.
(AirKayaks Side note #1: When initially removing the kayak from the carrying case, take a good look at how the kayak is folded This is probably the most overlooked step and it is VERY helpful when trying to get the kayak back into the bag.)
Chinook XP One Inflatation and Setup:
The included instructions are adequate and include diagrams with inflation details. Set up is straight-forward and simple  – unpack, unfold, inflate.

There are three inflation chambers utilizing Boston valves – the floor and two side chambers. Boston valves are two-part, screw-on valves. The bottom portion is threaded onto the kayak, the top valve is screwed open for inflation and then tightened shut after inflation. Air is easily released by unscrewing the base connector. How does it work? A flap inside the valve opens when air is pumped into the kayak, and falls shut when not pumped so that air will not rush back out.

According to the instructions, the floor is pumped up first, then the two side chambers. First, attach the Boston valves by screwing them onto the kayak.
(AirKayaks Side note #2: The Boston valves have a tether that keeps the valve attached to the kayak, ensuring that the valves don’t get lost after deflating. Make sure that the string does not get in the way when screwing on the valve base,and the valve is not cross-threaded, or you may have some air leakage.)

We pumped up the floor until firm (1.0 psi with slight give) using a standard double action hand pump – this took about 20 pumps.

We then pumped up each of the side chambers to 2 PSI – this was about 35 pumps each side – and screwed on the valve caps. (AirKayaks side note #3: If using a pressure gauge, please note

Original Source: AirKayaks >>

Video: AquaGlide Chelan HB Tandem XL Inflatable Kayak

See our new video on the AquaGlide Chelan HB Tandem XL – a 15 foot inflatable kayak perfect for two adults and child, furry friend or gear – with set-up overview and features.

You can also see our Detailed Product Review on the AquaGlide Chelan Tandem with photos!

Original Source: AirKayaks >>

Video: AquaGlide Columbia XP Tandem XL Inflatable Kayak

See our new video on the AquaGlide Columbia XP Tandem XL – a 15 foot inflatable kayak perfect for two adults and child, furry friend or gear – with set-up overview and features.

You can also see our Detailed Product Review on the AquaGlide Columbia XP Tandem with photos!

Original Source: AirKayaks >>

Product Review: Single & Double Spray Decks for Aquaglide Chelan & Columbia Kayaks

This past week we received our first shipment of AquaGlide splash decks – optional accessories which can turn your AquaGlide kayak from an open design to an enclosed one or two seater. The decks can be used with the Chelan, Columbia XP and Columbia HB series inflatable kayaks.

There are two deck options in three lengths – a single for solo paddling and a double for tandem paddling – sized to fit the single, two and tandem sizes. The spray decks keep water and wind out during chilly or inclement weather, while the coaming tubes allow you to attach optional spray skirts for even more protection from the elements.
We initially looked at the Tandem spray decks, a single and a double-seater sized for the Columbia XP, Columbia HB and Chelan Tandem XLs.
Installing the AquaGlide Spray Decks

The decks are quite portable. They each arrive rolled up in separate, draw-string, carrying cases measuring 42 x 3 x 12 inches and weighing in at 9 lbs each. (AirKayaks note: As the cases are identical, you may want to mark them 1 and 2 for differentiation.) 

Each deck comes with a repair kit and a set of 14 clips.
There are no instructions included, but once you get the hang of it, installing the decks is pretty simple.  We began with the double deck.

Remove the deck from the bag, and drape it over the kayak, aligning ends with the raised visors. (AirKayaks note: As we learned the hard way, there is a right and wrong way to orient the decks. Make sure that the plastic zippering “map case” is positioned in the bow, and that the twistlok valves on each of the coaming areas are on the back side of each cockpit opening.)

With the kayak fully inflated, take each of the clips and attach them to the cloth d-rings, located 6 on each side, and one each on the front and back raised visors. To make things easy, the clips can be left in position – if you purchase both decks, you’ll then have one full extra set if any clips are lost.

The visor portion is quite simple, but not intuitive at glance. Roll over the deck bow so that it slips over the raised visor – repeat this in the stern.

You will notice that each of the d-rings lines up with velcro strips on the spray decks.

Run the velcro loops through the clips, and fasten shut, pulling slightly to make it taught.

Next, inflate the two coaming tube twistloks (1 per seat). The coaming tubes help deflect water, but also can be used to attach optional spray skirts. The Boston valve adaptor will not friction fit over the twistlok so you will have to do one of

Original Source: AirKayaks >>

Product Review: AquaGlide Chelan HB One Inflatable Kayak

Last summer, AquaGlide unveiled their inflatable kayak lineup for 2015, which included a series of new models and revamps. Based on the number of inquiries, we were anxious to try out the new Chelan HB high-pressure series.
As the new models arrived, we started inflating and testing – initially focusing on the longer AquaGlide Chelan HB Tandem and Columbia XP Tandem kayaks.

Our third AquaGlide review for 2015 focuses on the Chelan HB One, an 11′ 4″ long, high-pressure, inflatable kayak designed for solo paddling. (Please note: some of the information will be repeated from other writeups.)
Getting Started with the Aquaglide Chelan HB One:
We unpacked the box and laid out the pieces – inflatable kayak, backpack, instructions, repair kit, foot brace, tracking fin, seat, valve adaptor and two plastic splash guards.

Initial measurements showed the kayak body weighs approximately 22 lbs, with a folded size of 25 x 9 x 21 inches. The kayak with seat, fin and brace – all in the backpack – weighs 29 lbs with a backpack size of roughly 27 x 22 x 18 inches, which can be cinched down. All boxed up, the  dimensions are 27 x 23 x 14 inches with a shipping weight of 35 lbs. We were able to get everything – plus a pump and paddle – into the pack.
(AirKayaks Side note #1: When initially removing the kayak from the carrying case, take a good look at how the kayak is folded. This is probably the most overlooked step and it is VERY helpful when trying to get the kayak back into the bag.)
The included instructions appeared adequate and include diagrams with inflation details.

Set up is straight-forward and simple  – unpack, unfold, inflate.
There are three military valves (both sides and the floor) with one more small chamber utilizing a twistlock valve for the seat base.
The instructions say to pump up the floor first, to 6 PSI. As the floor is held in place with two adjustable straps, from prior experience, we found it best to loosen up the straps, making it easier to center if necessary.

The military-style plunger valve is simple to use – with your finger, twist the plunger slightly to the “up” position to inflate (air goes in but doesn’t come back out) and “down” to deflate (air comes out).

The Chelan HB One military valves require a special adaptor, which does not come with most standard pumps. In Aquaglide’s first year, the military adaptors were not included with the high-pressure kayaks. All the 2015 high pressure models now include the adaptor, which is found in the repair kit.
The Aquaglide military adaptor couples to the valve with a Boston valve adaptor; this is a common fitting, slightly conical and about 1/2 inch

Original Source: AirKayaks >>

Choosing an Aquaglide Tandem XL Inflatable Kayak: Chelan vs. Columbia vs. Chinook

Last year, Aquaglide – a division of North Sports – launched their inflatable kayak line with a series of 13 models. For 2015, Aquaglide expanded to 19 models – including 7 new kayaks and 3 redesigns – with MSRP pricing from $199.95 to $1099.95.

The current line includes three Tandem XL models designed for one to two paddlers with extra space for gear, child or furry friend. This includes the Chelan (new model), Columbia (redesign) and Chinook (original model) inflatable kayaks.

The new Chelan high-pressure touring series is a hybrid of the original Columbia HB and Klickitat models. The Chelans feature the Columbia’s long sleek waterline but are constructed in the smooth skin Duratex material used on the Klickitats, which reduces drying time.

The Columbia HB series has undergone a significant manufacturing change from a high-pressure version to a standard pressure version, and is now called the Columbia XP, bridging the gap between the Chinook and Chelan product lines.
The Chinook XP series remains with its original design as an economical, standard pressure, recreational kayak.
We often get questions – which one should I choose?
The Columbia  and Chelan Tandems are 15 ft touring models with a sleek silhouette and long waterline, while the Chinook is a 12.5 ft recreational model built for price-point. While they have many differences, they have just as many similarities. Ultimately it comes down to a personal preference, so here are some things to think about.
AquaGlide Tandem XLs: What’s the same?
All three kayaks feature an open design for 2+ paddlers, but they can also be easily paddled by one. They each utilize velcro floor strips and multiple d-rings to create infinite seating positions while still leaving room enough for gear, a child or furry friend. All come with two seats with integrated fishing rod holders, a third jumper seat with TwistLok valve, foot braces, splash guards, bungee deck lacing, drain plug, removable tracking fin and molded rubber handles. Each have similar widths of 36 to 37 inches.
AquaGlide Tandem XLs: What’s different?

At 12.5 feet in length with a weight of 42 lbs in the pack (34 lbs kayak only), the Chinook XP Tandem is lighter-weight and the shortest.  The XP construction consists of three PVC chambers (floor and two side bladders) utilizing three Boston valves. The inflation chambers have a zippered fabric covering, which allows the chambers to be replaced if necessary, but also increases drying time. These chambers can be inflated 1 to 2 PSI respectively. Despite the lower pressure, the floor covering is attached to the sides, which helps in durability and increasing structural rigidity somewhat. Other features include paddle holders, drawstring carrying case and one drain plug. The Core seats have a one-inch foam base (paddlers sit lower in

Original Source: AirKayaks >>

Product Review: AquaGlide Columbia XP Tandem Inflatable Kayak for 1-3 paddlers

We continue with the second in our series on the new 2015 Aquaglide line of inflatable kayaks – our first review focused on the high-pressure Chelan HB Tandem XL touring kayak.
This year AquaGlide debuted the Columbia XP recreational line of kayaks consisting of three standard-pressure models – the Columbia XP One for solo paddling, the Columbia XP Two for one to two paddlers and the Columbia XP Tandem XL.

This review features the Columbia XP Tandem XL, a 15 foot long inflatable kayak designed for one or two paddlers, with extra space for gear, child or pet. (Please note: some of the information will be repeated from other writeups.)
Getting Started with the Aquaglide Columbia XP Tandem XL:

We unpacked the box and laid out the pieces – inflatable kayak, backpack, instructions, repair kit, foot braces, tracking fin, two standard seats and a jumper seat.
Initial measurements showed the kayak body weighs approximately 40 lbs, with a backpack size of roughly 27 x 22 x 18 inches, while the kayak with seats, fin and braces – all in the backpack – weighs 49 lbs. Boxed up, the dimensions are 30 x 23 x 16 inches inches with a shipping weight of 59 lbs.
(AirKayaks Side note #1: When initially removing the kayak from the carrying case, take a good look at how the kayak is folded This is probably the most overlooked step and it is VERY helpful when trying to get the kayak back into the bag.)

The included instructions are adequate and include diagrams with inflation details.

Set up is straight-forward and simple  – unpack, unfold, inflate.

There are three inflation chambers utilizing Boston valves – the two side chambers and floor. There is one more small chamber with a twistlock valve for the jumper seat base. The floor is pumped up first.

Boston valves are two-part, screw-on valves. The bottom portion is threaded onto the kayak, the top valve is screwed open for inflation and then tightened shut after inflation. Air is easily released by unscrewing the base connector. How does it work? A flap inside the valve opens when air is pumped into the kayak, and falls shut when not pumped so that air will not rush back out.
(AirKayaks Side note #2: The Boston valves have a tether that keeps the valve attached to the kayak, ensuring that the valves don’t get lost after deflating. Make sure that the string does not get in the way when screwing on the valve base, and the valve is not cross-threaded, or you may have some air leakage. Also make sure the ring plate or “base” ring is also screwed on tightly.)

With the base portion screwed onto the kayak body, and the top portion screwed open, locate the

Original Source: AirKayaks >>