Tag Archives: kayaks for 1 to 3 paddlers

Product Review: New Innova Seawave Inflatable Touring Kayak for 1-3 paddlers

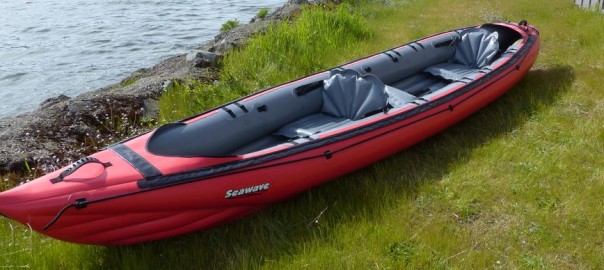
This past week we had the opportunity to take our first look at the Innova Seawave inflatable kayak – a two+ person kayak with a versatile design that allows one to attach optional spray decks, spray skirts and a foot rudder system.

The Innova line is unique for a number of reasons. First, all the kayaks are handmade in the Czech Republic; the factory has manufactured inflatable boats for well over 50 years. In Europe, a similar line is marketed under the name Gumotex.
We previously published our review on the new Solar 410C, Innova’s other 2+ person inflatable introduced into the US market simultaneously. So here is our write-up on the the Innova Seawave inflatable tandem kayak, which weighs 44 lbs in the pack, is 15 feet in length with a payload of 551 lbs for two+ persons and gear. (Please note: some of the information will be duplicated from other Innova reviews).
Getting Started with the Innova Seawave
The box as received weighs in at 48 lbs, measuring 27 x 18.5 x 12.5 inches.

Inside is a very nifty 100L backpack with adjustable shoulder straps, front pouch pocket and roll top closure. This contains the kayak body, tracking fin, foot rests, repair kit, instructions, cinch belt, valve adaptor, seats and sponge. Packed dimensions are 24 x 17 x 12 inches as received in the bag, with a weight of 44 lbs. The kayak with seats and foot rests is 41 lbs. (Please note: This is the actual kayak weight, NOT the 29 lbs as stated from the manufacturer’s literature.)
Innova Seawave Kayak Setup/Inflatation
We read through the included instruction manuals. Just like all the other Innova  products, the Innova Seawave manual is surprisingly detailed in some aspects, while lacking in others. As the kayaks are made in Europe, many of the details are based around European specs and regulations and can sound more complicated than it actually is. Additionally, some of the translations are a bit difficult to understand.

First step, unpack and unfold the kayak body. What is immediately noticeable is how FLAT the kayak is when deflated – of course, this makes it quite compact for travel.

Next, flip the kayak over to install the tracking fin before inflation, locating the fin “shoe” towards the stern. Slip the end with the larger slot in first, making sure that the fin is pointing towards the “back” of the kayak. This enables it to slide in enough to fit in the second side.

The instructions suggest attaching and inflating the foot braces and seats first, though these actually come pre-attached from the factory. (If they are not attached, start with the foot braces. There are five buckles on the floor – when paddling tandem, use the 1st and
Original Source: AirKayaks >>

Product Review: AquaGlide Columbia XP Tandem Inflatable Kayak for 1-3 paddlers

We continue with the second in our series on the new 2015 Aquaglide line of inflatable kayaks – our first review focused on the high-pressure Chelan HB Tandem XL touring kayak.
This year AquaGlide debuted the Columbia XP recreational line of kayaks consisting of three standard-pressure models – the Columbia XP One for solo paddling, the Columbia XP Two for one to two paddlers and the Columbia XP Tandem XL.

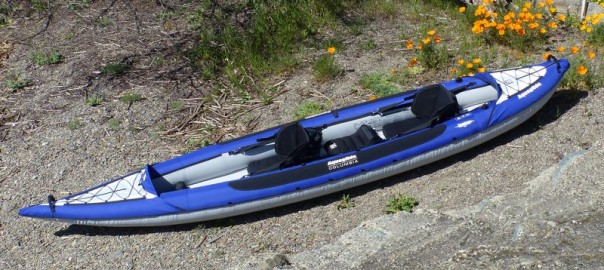
This review features the Columbia XP Tandem XL, a 15 foot long inflatable kayak designed for one or two paddlers, with extra space for gear, child or pet. (Please note: some of the information will be repeated from other writeups.)
Getting Started with the Aquaglide Columbia XP Tandem XL:

We unpacked the box and laid out the pieces – inflatable kayak, backpack, instructions, repair kit, foot braces, tracking fin, two standard seats and a jumper seat.
Initial measurements showed the kayak body weighs approximately 40 lbs, with a backpack size of roughly 27 x 22 x 18 inches, while the kayak with seats, fin and braces – all in the backpack – weighs 49 lbs. Boxed up, the dimensions are 30 x 23 x 16 inches inches with a shipping weight of 59 lbs.
(AirKayaks Side note #1: When initially removing the kayak from the carrying case, take a good look at how the kayak is folded This is probably the most overlooked step and it is VERY helpful when trying to get the kayak back into the bag.)

The included instructions are adequate and include diagrams with inflation details.

Set up is straight-forward and simple  – unpack, unfold, inflate.

There are three inflation chambers utilizing Boston valves – the two side chambers and floor. There is one more small chamber with a twistlock valve for the jumper seat base. The floor is pumped up first.

Boston valves are two-part, screw-on valves. The bottom portion is threaded onto the kayak, the top valve is screwed open for inflation and then tightened shut after inflation. Air is easily released by unscrewing the base connector. How does it work? A flap inside the valve opens when air is pumped into the kayak, and falls shut when not pumped so that air will not rush back out.
(AirKayaks Side note #2: The Boston valves have a tether that keeps the valve attached to the kayak, ensuring that the valves don’t get lost after deflating. Make sure that the string does not get in the way when screwing on the valve base, and the valve is not cross-threaded, or you may have some air leakage. Also make sure the ring plate or “base” ring is also screwed on tightly.)

With the base portion screwed onto the kayak body, and the top portion screwed open, locate the

Original Source: AirKayaks >>