AirKayaks: Guide to Choosing Your Advanced Elements Inflatable Kayak

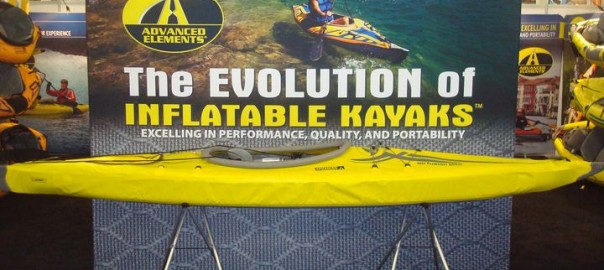
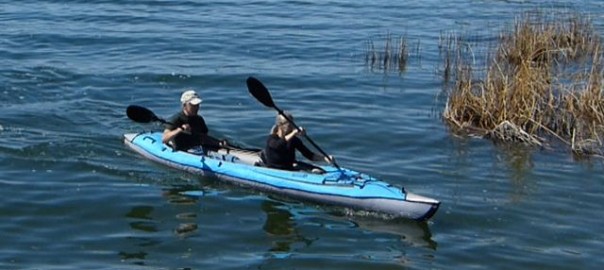
One of the leading inflatable kayak design companies is Advanced Elements, located in Benicia, California.

Founded in 2002 by two inventors, Charlie Hall and Clay Haller, the Advanced Elements line has grown into one of the best-known lines of inflatable kayaks. From the company’s inception, Clay and Charlie desired to push the envelope with a new concept – a “hybrid” design of inflatable and rigid components that perform more like a hard shell kayak, but portable, lightweight, and affordable.
Today, Advanced Elements is well-known for durability, performance and innovation. The 2015 lineup includes 12 kayak models with three variations, ranging in size from 7 ft 9 inches to 15 ft.  These span the gamut of recreational to touring, fishing to whitewater, open and closed designs, in both solo and tandem models.
With this many choices, where does one start?

If this is your first kayak, you may want to read our Guide to Choosing an Inflatable Kayak – What You Should Consider, which explains some of the generic features and concepts in inflatable kayaks.
If you have a good idea what you’re looking for, AirKayaks has prepared a table outlining and comparing each of the Advanced Elements models. This is separated into three sections:

Solo models under 10 feet in length
Solo models over 10 feet in length
Tandem models for one or two paddlers.

How do you use this table? First, ascertain the paddler sizes – are you big and tall or average?
Then decide the type(s) of paddling you want to do (paddling situations):

Touring – Long paddles, camping, open water
Coastal – Open water, waves, bays
Recreational – Lakes, sloughs, slower rivers, calm waters
Whitewater – Fast-moving maneuvering with eddies, drops.
Wave surfing
Fishing

Determine what attributes are important (or not!) to you – do you want portability or storage capacity? Stability or speed?

Follow the color key to decide which kayak is good for varying sizes and activities:
Blue – The kayak is great!
Green – The kayak is good.
Orange – The kayak is okay.
Yellow – This kayak is not recommended.
For instance, if you were average weight and height, and calm water paddling was a priority, then the AE1017 Sport might be a great choice. But, if you planned on some open water or inclement weather paddling, then the AE1012 – with its enclosed deck – might be best.

If you are having trouble viewing the details in the table (separated into three),  follow this link for a larger and printable version of the Choosing Your Advanced Elements Inflatable Kayak.
Solo models under 10 feet in length

Solo models over 10 feet in length

Advanced Elements tandem kayaks for solo or double paddling.

Once you’ve narrowed down your choices, you can view details on the various Advanced Elements inflatable kayaks at http://www.AirKayaks.com. You can also read the following product reviews –

Original Source: AirKayaks >>

Product Review: Mistral Kailua Fit 11-5 Inflatable Fitness Paddle Board

This past month we received our first shipment of standup inflatable paddle boards from Mistral.
Founded in 1972, European-based Mistral rapidly became one of the leaders in the windsurf industry. Mistral has since refocused the product line, branching into paddle boards and kite surfing – even watches and clothing.

Recently, Mistral expanded into the inflatable SUP market. The 2015 line includes the popular all-around Adventure boards, a fitness-oriented board named the Kailua Fit, and a new line of high-pressure, lightweight, sub-20 lb. boards made in Europe – the Equipes and Crossovers. With the introduction of the new Crossover inflatable WindSup boards, Mistral is brought full-circle, back to their roots.
Our first review features the Mistral Kailua Fit, an 11′ 5″ inflatable paddle board decked out for stand up paddling as well as yoga/fitness workouts.
(Please note: some of the info will be repeated from prior write-ups.)
Mistral Kailua Fit 11’5 Inflatable Yoga Standup Paddle Board – Getting Started
The board as-arrived is 33 x 18 x 10 inches in the box, weighing in at 34 lbs.

Inside is the Kailua body, backpack, repair kit, single action pump with pressure gauge, removable fin, fitness cord and instructions. Once rolled up, the SUP board fits into the backpack, as well as a breakdown paddle under 35 inches (longest shaft length) and the pump.

The board itself weighs 24.6 lbs, or 28.8 lbs inside the backpack with pump – these all easily fit in the back of a small car.

For your first set up, remove the SUP body from the backpack, and unroll. Lay it out face up so that you can access the military valve.

The Kailua 11-5 utilizes one spring-loaded military valve for inflation. These are very simple to use and feature an inflate mode (spring plunger is UP) and a deflate mode (spring plunger is DOWN). By using your finger to gently push on the plunger, it can be moved to the inflate mode (air goes in and doesn’t come back out) and deflate mode (air goes in and comes back out) – before you make the effort to inflate the board, PLEASE make sure the plunger is in the inflate position.
The Kailua paddle board system includes a high-pressure, single-action pump with a gauge – what we term the “slim barrel” as it pushes out a bit less air, making it easier to attain very high pressures.

First, hook the gauge onto the pump then attach the hose to the gauge. Push and twist the military valve adaptor onto the valve, and lock into position – you’re ready to pump!

Initial pumping is a breeze. I pumped for about 180 strokes (3+ minutes) until the board filled out and the gauge started to move. With another 50 strokes I was at

Original Source: AirKayaks >>

Sneak Preview: 17′ Ride XL Inflatable SUP for Multi-paddlers from Red Paddle Co.

Party time! Red Paddle Co recently released information on their new behemoth, the 17-foot Ride XL.

Capable of holding up to 8 people, the Ride XL is a great board for families, water events, summer camps or clubs.

With a 60″ width and 8 inch depth, the Ride XL features 8 hefty carrying handles. Four military inflation valves allow four people to pump it up at one time, spreading out the workload. Four integrated thruster fins provide tracking.

Features and Specifications:

Length – 17 feet
Width – 5 feet
Depth – 8 inches
Eight carry handles
4 Military Valves
Comes with Titan pump.

MSRP $3249, arriving late April/early May. For more details or to order, see the Ride XL Inflatable Paddle Board product page at AirKayaks.com

Original Source: AirKayaks >>

Product Review: New Innova Swing EX 13.5 ft Inflatable Touring Kayak

This past summer, Innova Recreational Products of Burlington, WA announced the latest addition to their inflatable kayak lineup – the Swing EX.
As mentioned in previous write-ups, the Innova line is unique in that the kayaks are handmade in Czechoslovakia rather than China or Korea. Additionally, the Swing series (now consisting of the Swing 1, the Swing 2 Double and the new Swing EX) – as well as the Twist series – utilize materials that are PVC-free, making them a greener option than most kayaks on the market.

This week we had the first opportunity to take out the Innova Swing EX, a 13′ 6″ solo inflatable touring kayak weighing a mere 28 lbs with a selling price of $999. Please note, some of this will be repeated from the previous Swing reviews, as there are obviously many similarities.
Getting Started with the Innova Swing EX Inflatable Kayak
The box as received weighs 31.2 lbs with dimensions of 28 x 18 x13 inches.

Inside is the Swing EX body – neatly folded with a cinch strap inside a lightweight drawsack – multiple instruction sheets, 3 metal insertion bars, tracking fin, seat, foot rest, coaming collar, repair kit, and valve adaptor. At 28 lbs for the combined package and a folded size of 23 x 17 x 11 inches, the Swing EX is small enough to fit in plane overhead cargo bins.
Swing EX Kayak Setup/Inflatation
As with all the Innova manuals to date, the Swing EX instructions are quite detailed – there is one instruction sheet for fin installation, one for utilizing the valves, another on the kayak in general and added instructions detailing the “insertion bars.” As the kayaks are made in Europe, many of the details are based around European specs and regulations.

First step, unpack and unfold the kayak body. What is immediately noticeable is how FLAT the kayak is when deflated.

Install the tracking fin before inflating the kayak. The Swing EX utilizes a single fin with double slots. Slip the end with the larger slot in first, making sure that the fin is pointing towards the “back” of the kayak. This enables it to slide in enough to fit in the second slot. While the first time can be a struggle to get the back side into position, after a couple of rounds it becomes quite easy. Do make sure it is solidly in position.

Attach the foot brace (this comes attached from the factory) by weaving the webbing through the floor connector and back. The foot brace uses a twistlok valve for inflation. There are no adaptors that couple with the valve, so you must either hold the adaptor onto the valve while pumping with one hand, have someone else hold the adaptor in

Original Source: AirKayaks >>

Product Review: JP-Australia CruisAir 12’0″ Inflatable SUP Paddle Board

This past summer we took our first look at the JP-Australia inflatable SUPs.

Part of the Pryde Group, JP-Australia has been a well-known player in the windsurf board industry; recently, JP-Australia moved into paddle boards, bringing their line of inflatable SUPs to the US. This past summer we took our first look at the 15 PSI JP-Australia CruisAir – a 12-foot, 32-inch wide all-around cruising and touring inflatable paddle board.  (Please note: some of the info will be repeated from prior writeups.)
JP-Australia CruisAir 12-0 Inflatable SUP – Getting Started
The board as-arrived is 36 x 20 x 11 inches in the box, weighing in at 37 lbs.

Inside is the CruisAir 12’ body, backpack, repair kit, single action pump with pressure gauge, cinch belt, removable fin and instructions. Once rolled up, the SUP board fits into the backpack, as well as breakdown paddle (longer shafts can jut out of the top) and the pump; the pump can also be strapped to the side of the pack. The board itself weighs 25 lbs, or 31 lbs inside the backpack with pump – these all easily fit in the back of a small car.

For your first set up, uncinch the strap and unroll the SUP body. Lay it out face up so that you can access the military valve.

The CruisAir 12-0 utilizes one spring-loaded military valve for inflation. These are very simple to use and feature an inflate mode (spring plunger is UP) and a deflate mode (spring plunger is DOWN). By using your finger to gently push on the plunger, it can be moved to the inflate mode (air goes in and doesn’t come back out) and deflate mode (air goes in and comes back out). Not to worry, the instructions are printed on the valve. But before you make the effort to inflate the board, PLEASE make sure the plunger is in the inflate position.

The CruisAir paddle board system includes a Bravo high-pressure, single-action pump with a gauge – what we term the “wide barrel” as it pushes out a bit more air, though takes a little more effort to attain very high pressures.

First, screw the gauge onto the hose. Tip #1: Make sure you screw the gauge on carefully – if it gets cross-threaded, air will leak out and you will have a difficult time pumping the board up to necessary pressure. Then attach the hose to the pump barrel.

Take the military valve adaptor, and screw it onto the valve slightly to lock into position – the first time, you may need to push a bit harder to attach, but it gets easier. You’re ready to pump!

After 100 strokes with the single action pump, the board started to fill out, and at

Original Source: AirKayaks >>

Sneak Preview: Revolutionary Titan High Pressure SUP Pump from Red Paddle Co.

Red Paddle Co has recently announced the newest addition to the Red Air product line – the Titan High Pressure SUP pump, which cuts inflation time in half.

For years, the standard inflatable SUP pump was the Bravo HP single-action, high volume/low pressure pump, a squatter, thick-barrel single-action pump designed to put in more air volume, which in turn took more effort to reach higher pressures.
Higher pressures in an inflatable board vastly improves the board performance, by increasing rigidity (reducing flex).

In 2013, Red Paddle Co introduced the HP EZee  single-action, low volume/high pressure pump, a taller, thin-barrel single action pump designed to put in less air per stroke, thus allowing one to more easily pump to higher pressures.
As the pros and cons of each are obvious – one fills a board up more rapidly, while the other takes longer but is less of a struggle to reach 18-20 PSI – numerous paddlers opted to purchase both pumps.
In response, other manufacturers have recently expanded the slim-barrel design to a double-action pump, putting air in on the up and down stroke. While theoretically this will put air in twice as fast, in actuality it becomes a struggle on the “up” stroke.

The Red Paddle Co Titan pump is an amalgamation of the two pumps. The new Titan pump has two chambers, basically one side is a high volume/low pressure, and the other a low volume/high pressure. A unique double gear system actually combines the two chambers, so that when initially pumping, paddlers are using BOTH chambers to fill the board, allowing them to put in a whopping 4.71 liters, compared with just over 2 liters for the standard HP pump. When the pumping starts to get tough, one can switch the internal gear over to the high pressure chamber, allowing one to easily attain higher PSIs with less effort. An integrated pressure gauge allows one to monitor the process.
Another neat feature – the ergonomic angled feet allow one to step back from the pump, making it a more comfortable stance and solving the problem of the pump handle hitting your knees.
Initial tests comparing the Titan with the HP and HP EZee single action pumps showed the Titan pump decreased inflation time and number of pumps by up to 50%, dependent on the pump used. Using a 9-2 Surfstar, the Titan was able to get to 8 PSI with 35 strokes using the dual chambers, then with another 78 strokes the board was up to 18 PSI with the high pressure chamber – for a total of 2 minutes. In fact, tests measured the Titan pump air flow output at 61 mph versus 38 mph for the standard pump.
Watch a video comparison on using the

Original Source: AirKayaks >>

Video: Red Air Explorer 12-6 Inflatable SUP Board from Red Paddle Co

See our video on the 2015 version of Red Paddle Co’s popular workhorse – the Red Air Explorer 12-6 inflatable paddle board.  With a payload of nearly 350 lbs, multiple cargo attachment points, and constructed from a beefy 150mm dropstitch material, the Explorer is a great choice for larger or multiple paddlers, fishing excursions and camping trips.

 
All see our Detailed Product Review on the Red Air Explorer 12-6 Inflatable SUP. Or visit the Explorer product page on our website at http://www.AirKayaks.com

Original Source: AirKayaks >>

Choosing a Portable Breakdown Paddle for Inflatable Kayaks

So you’ve made the decision on an inflatable kayak. You’ve researched yourself to death, and have finally narrowed it down to the one that’s perfect for you. A sigh of relief – the hard part is over – until you find there are just as many choices, styles and incomprehensible terminologies for breakdown paddles.

Paddle lengths, materials, paddling styles, techniques – where to start?
Assuming that portability is the highest priority, AirKayaks has partnered with Accent and Cannon Paddles to help demystify the process of choosing a breakdown (or take-down) kayak paddle.
First of all, what is a breakdown kayak paddle?
Unlike a canoe paddle, which has one blade, shaft and handle grip, a kayak paddle features two blade heads (left hand and right hand) and a shaft.

The paddler grips the shaft with both hands, and dips one blade into the water and pulls, then dips the other side into the water and pulls. This is a more efficient method of paddling when sitting lower in the water.

While there are 2-pc breakdown paddles on the market, the most portable paddles are the 4-pc breakdown paddles consisting of two shaft lengths that connect into one, and two blades – a left hand and right hand – that attach onto the shaft. 4-pc breakdown paddles for inflatables typically have a longest shaft length of 25 to 30 inches in length, making them easily storable, often in the kayak carrying case.
What length should I look for?
Since inflatable kayaks are typically wider than hardshell kayaks, a 230 or 240cm paddle is considered a good length. For those confused with the measurement system, a 230cm paddle is 90.55 inches in length while a 240cm paddle is 94.5 inches in length (2.54 cm per inch).
The choice of either is a personal preference, but you should consider your height, paddling style and typical paddling conditions. In general, 230cm is good for persons under 6 feet, high-angle paddlers, and those in fast moving paddling conditions. Paddlers over 6 feet, low-angle paddlers and those in calmer touring conditions may be more comfortable with a 240cm, though our largest-selling paddle for inflatable kayaks is the 230cm size.
What is low and high angle paddling?
Low angle paddling keeps the blade more horizontal and can be less fatiguing.

It is often used for long-range touring, to save energy, in calmer waters and in wider kayaks.
With high angle paddling, the kayaker is lifting the blade up more perpendicular to the kayak.

This uses up more energy, but there is more power in each stroke, propelling one faster, making one more maneuverable and getting a solid workout. It is more aggressive but much more fatiguing.
Which material should I choose?
Our breakdown paddles are typically constructed of aluminum, fiberglass, carbon or a carbon

Original Source: AirKayaks >>

Product Review: 2015 Red Air Ride 9-8 Inflatable SUP Board from Red Paddle Co

In October, some of the new Red Air 2015 models from Red Paddle Co arrived in the States. Having previously reviewed the 2012 and 2013 models, we were eager to take a re-look to see how the boards had evolved; we weren’t disappointed.

The bulk of the 2015 inventory sailed in a few weeks later. Our first choice was the Ride 9-8, a new 2015 model which blended the best attributes of the previous Allwater 9-6 and Surfer 10-0.
Well-known for their ruggedness, each of the Red Air boards utilize high-pressure, dropstitch technology – allowing them to be inflated from 15-25 PSI – and feature quadruple rail construction with double layering.
Following is our write-up on the 2015 Red Air Ride Nine Eight from Red Paddle Company. (Please note, some of this is repeated from previous writeups.)
Getting Started with the Red Paddle Co Ride 9-8
The box as received weighs 36 lbs, measuring 37 x 15 x 15 inches.

Inside the box is the SUP body, back pack, HP EZee pump, pressure gauge, cinch belt, fin guards, RSS side battens, instructions and repair kit – and a very nifty bonus cell phone case! Once rolled up, the SUP board and pump fit into the backpack, as well as a breakdown paddle under 37 inches.

Weight is 33 lbs for backpack, board and pump, which all easily fit in the back of a small car. The board alone is just under 25 lbs.
The 9-8 Ride inflatable SUP arrives rolled up inside the backpack. While French instructions were sitting in the box, if you locate the cell phone case (attached to the back pack), the English version is folded inside.

Remove the fin guards and unroll the SUP body. There are three integrated tracking fins at the rear of the board. Lay it out face up (fins down) so that you can access the military valve.

The Red Air Ride 9-8 utilizes one spring-loaded military valve for inflation. These are very simple to use and feature an inflate mode (spring plunger is UP) and a deflate mode (spring plunger is DOWN). By using your finger to gently push on the plunger, it can be moved to the inflate mode (air goes in and doesn’t come back out) and deflate mode (air goes in and comes back out). Before you go to all the effort of inflating the board, PLEASE make sure the plunger is in the inflate position.

The included single-action pump comes with a pressure gauge, so you can monitor the board’s PSI. The gauge screws onto the pump – pull the pump handle up (so the pump body doesn’t get in the way) then start with the gauge face down and it will screw on to end face up.

Original Source: AirKayaks >>